
Appearance
Installation
Information for Mac App Store customers
The latest version of PopClip is 2025.9.2, but it is not available as an update on the Mac App Store. If you are still using the last released Mac App Store version, 2023.9, then you can migrate for free to the Standalone edition to receive the latest updates.
This page will guide you through the process of obtaining and installing PopClip on your Mac.
Obtaining PopClip
There are 2 ways to obtain PopClip:
- Standalone (free trial, unlockable with license key): Download PopClip from the downloads page on this website. The download is a zip file containing the PopClip app. Unzip the file and drag the PopClip app to your Applications folder.
- Setapp: Setapp is a subscription service for Mac apps, offering access to hundreds of Mac apps for $9.99 per month. If you're a Setapp customer, PopClip is included in your subscription. Simply search for "PopClip" in the Setapp interface and click Install.
I refer to the above two variants of PopClip as editions. The editions share the same features and abilities, and the only significant difference is the way you obtain the app and how you buy it. There are some minor differences, which I will point out where relevant.
Requirements
The latest version of PopClip requires macOS 11 (Big Sur) or later. It is compatible with both Intel and Apple Silicon Macs.
Older versions of PopClip are available for older operating systems. See the downloads page.
Free trial
When you first install the Standalone edition of PopClip, it operates in free trial mode. The free trial mode includes all features, but after you have used 250 PopClip actions it will nag you to buy the app. You can buy a license key to unlock the app and remove the nagging.
Registering the license key
Your license key will be delivered to you as file whose name ends with .popcliplicense. Save the license key file to your Mac and double click it. PopClip will automatically open the file and register itself with the license key.
Your license in iCloud
If you have iCloud enabled on your Mac, PopClip will automatically save your license key to iCloud. If you have multiple Macs signed in to the same iCloud account, the license key will be shared between them. It will also be waiting for you when you install PopClip on a new Mac.
First launch
By now, you should have a copy of the PopClip app in the Applications folder (or in the Setapp folder inside the Applications folder) on your Mac. Double-click the PopClip app to launch it.
Granting Accessibility permission
When you first launch PopClip, its settings window will appear on the on screen with the message: Accessibility access is required.
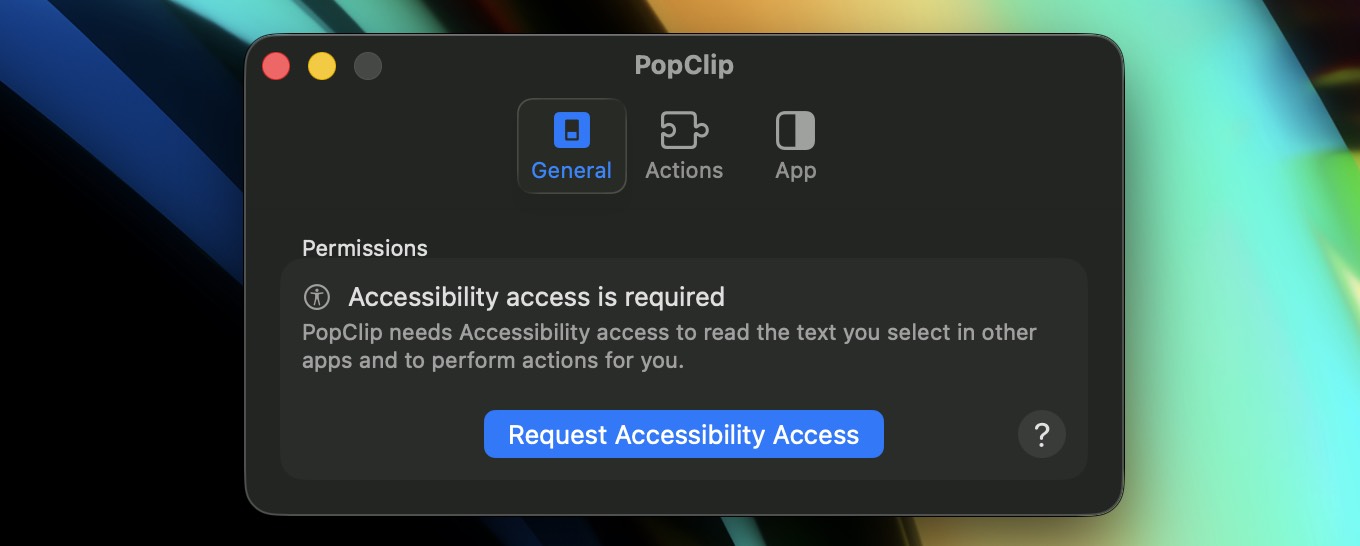
Why is Accessibility permission needed?
PopClip uses a macOS feature called the Accessibility API to read the text you select in other apps. Since this is an essential part of PopClip's operation, you cannot use PopClip without enabling Accessibility access.
PopClip only uses the Accessibility API to read the text you select. All processing is done locally on your Mac and no selected text is stored or transmitted anywhere, except when you explicitly invoke an internet-connected action such as a web search. See also Privacy Policy.
How to grant Accessibility permission
Click the Request Accessibility Access button and a macOS dialog appears:
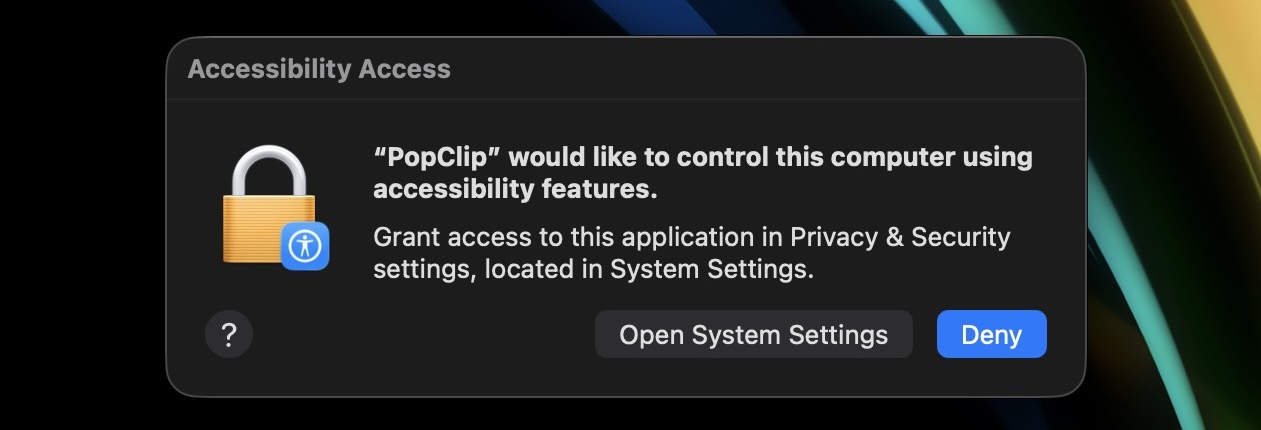
Now click Open System Settings and you will be taken to the Security & Privacy pane of System Settingscurl. On macOS 26.0 and above it looks like this:
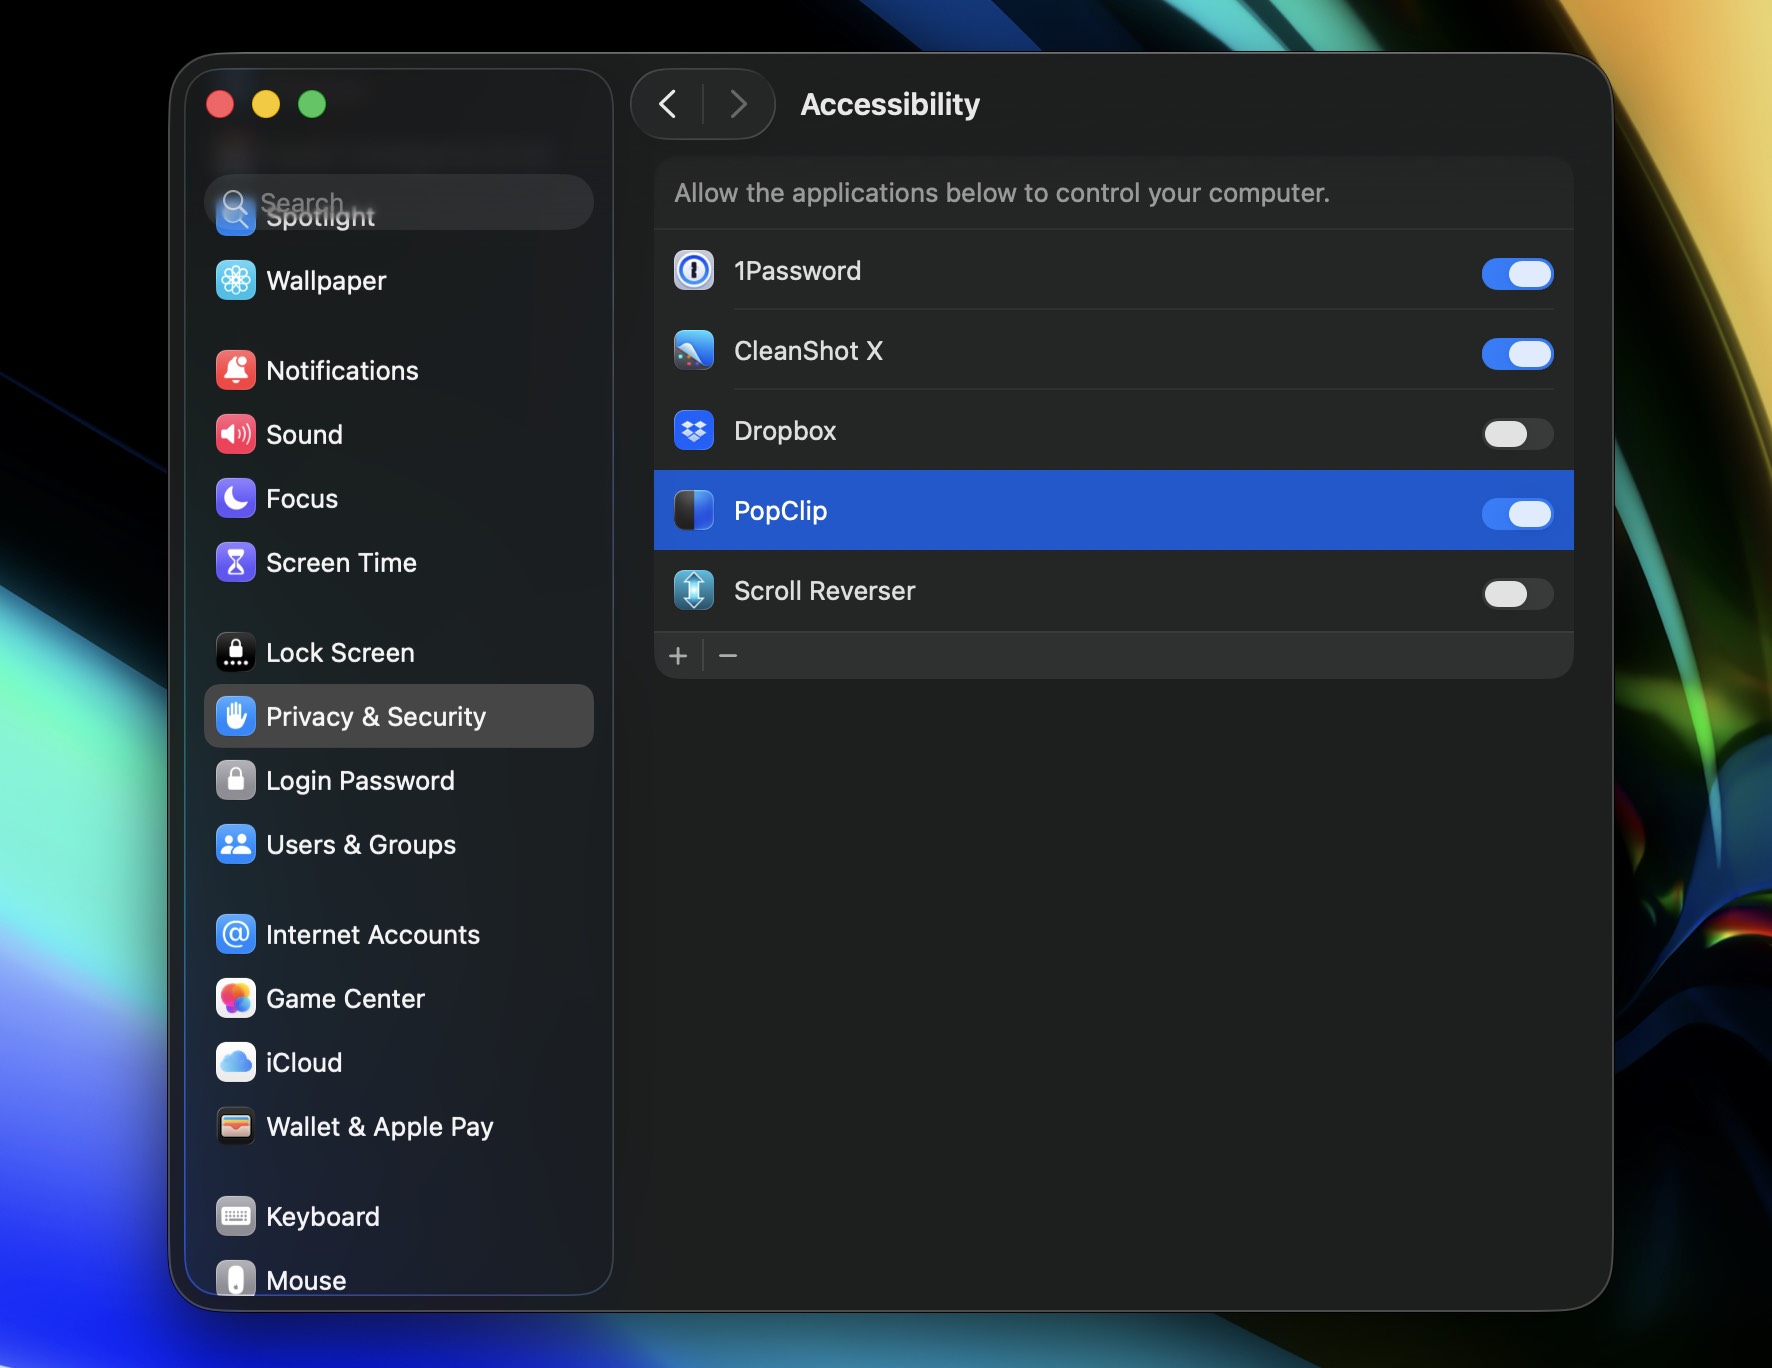
Toggle the slider for PopClip to on. You will be prompted to enter your password to confirm the change.
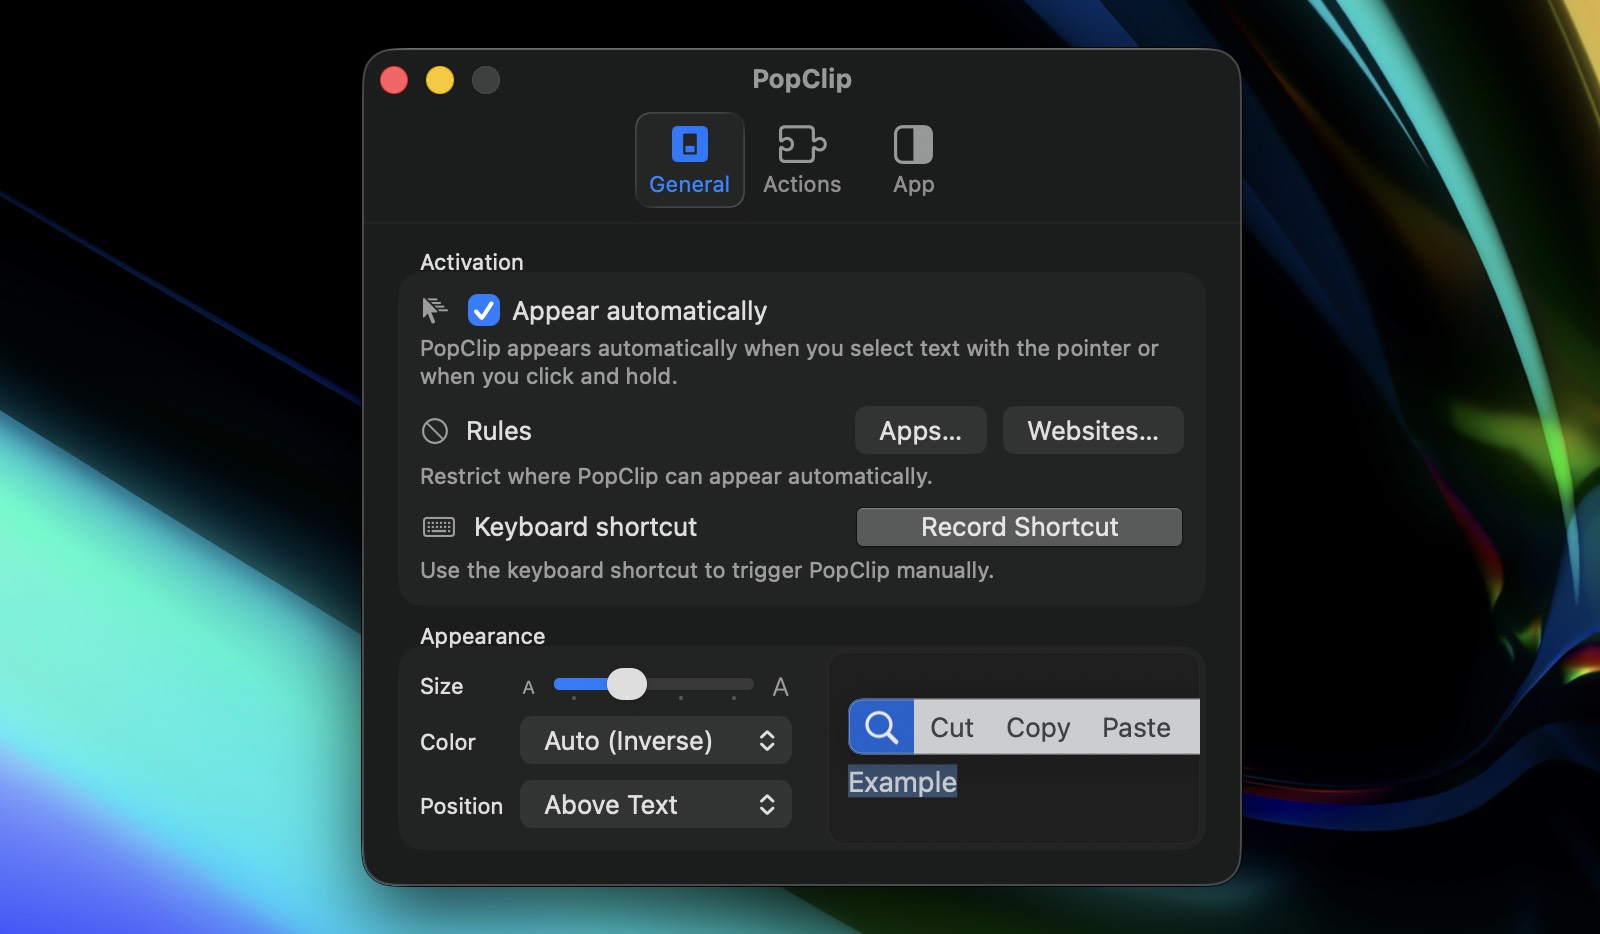
After access is granted, the General settings pane will change to show its full contents:
Next, we will put PopClip though its paces!
Uninstalling PopClip
Before we move on, let's take a moment to learn how to uninstall PopClip.
First, quit PopClip if it is running.
Drag the PopClip app from your Applications folder (or the Setapp folder inside the Applications folder) to the Trash.
Optionally, to also remove all PopClip settings, extensions, and supporting files from your Mac, delete the files and folders listed in Paths and identifiers.