
Appearance
Snippets
A snippet is the simplest kind of PopClip extension, because it is just plain text. PopClip can load a snippet directly from a text selection, without the need for separate files or folders.
Example
It is easiest to start with an example:
yaml
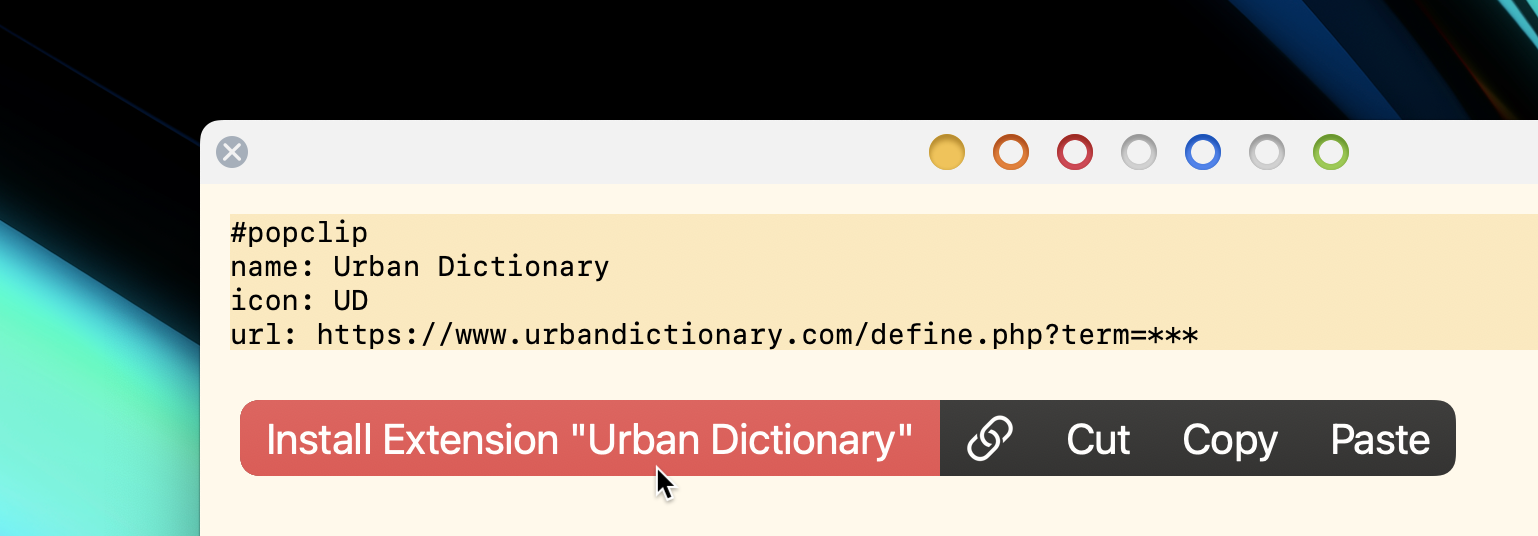
#popclip
name: Urban Dictionary
icon: UD
url: https://www.urbandictionary.com/define.php?term=***
When you select whole block of text above, PopClip will detect the snippet and offer an "Install Extension" action.
Format
A snippet always begins with #popclip (or # popclip) and can be up to 5000 characters long. It is parsed as YAML 1.2. The body of the snippet defines the extension's config dictionary.
Commments in snippets
Note that # begins a YAML comment. Thus the entire snippet including the #popclip line parses as valid YAML.
Creating snippets
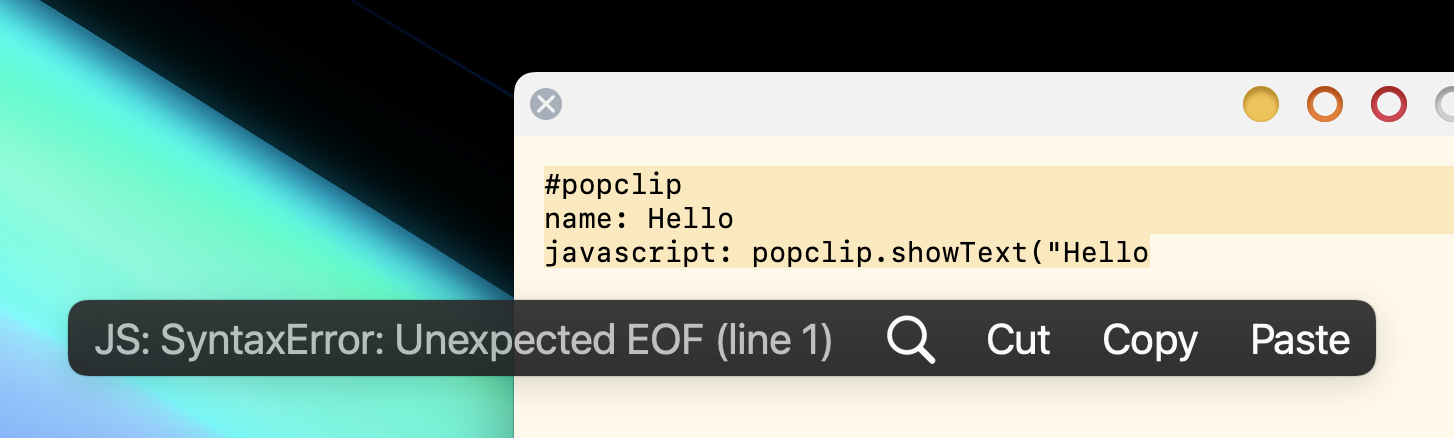
PopClip will display any errors it encounters while trying to load the snippet in the PopClip bar itself.
In the absence of an identifier field, the name acts as the identifier for the extension. Installing a snippet with the same name as an existing snippet will replace it.
A snippet can do everything that a package extension can do. The only limitation is that it can't refer to any external files.
More examples
A Shortcuts example:
yaml
# popclip shortcuts example
name: Run My Shortcut
icon: symbol:moon.stars # Apple SF Symbols
macos version: '12.0' # shortcuts only work on Monterey and above!
shortcut name: My Shortcut Name
A Service example (this time using flow-style YAML markup, with braces):
yaml
#popclip service example
{ name: Stickies, service name: Make Sticky }
A Key Press example:
yaml
#popclip key press example
name: Key Press Example
key combo: command option J
An shell script example:
yaml
#popclip shellscript example
name: Say
interpreter: zsh
shell script: say -v Daniel $POPCLIP_TEXT
A JavaScript example, including multiple actions:
yaml
#popclip js + multi action example
name: Markdown Formatting
requirements: [text, paste]
actions:
- title: Markdown Bold # note: actions have a `title`, not a `name`
  icon: circle filled B
  javascript: popclip.pasteText('**' + popclip.input.text + '**')
- title: Markdown Italic
  icon: circle filled I
  javascript: popclip.pasteText('*' + popclip.input.text + '*')
json
#popclip js + multi action example
{
  "name": "Markdown Formatting",
  "requirements": [
    "text",
    "paste"
  ],
  "actions": [
    {
      "title": "Markdown Bold",
      "icon": "circle filled B",
      "javascript": "popclip.pasteText('**' + popclip.input.text + '**')"
    },
    {
      "title": "Markdown Italic",
      "icon": "circle filled I",
      "javascript": "popclip.pasteText('*' + popclip.input.text + '*')"
    }
  ]
}
#1 rule of YAML: Do not indent with tabs!
When writing snippets in YAML with indented parts, as in the example above, do not use tabs for indenting. YAML does not allow it — use spaces instead.
Inverted syntax
PopClip also supports an "inside out" snippet syntax, which looks like this:
javascript
// #popclip
// name: Hello JS
// icon: Hi!
// language: javascript
const greeting = "Hello " + popclip.input.text;
popclip.showText(greeting);
This method, which I call inverted syntax, offers several benefits: we get code syntax highlighting and autocomplete from our text editor, and we don't have to indent the script awkwardly in the YAML.
The inverted syntax is supported for JavaScript, AppleScript and shell script actions.
When using the inverted syntax, the whole text of the snippet becomes the javascript file, module, applescript file or shell script file for the extension. The config header should be added using the appropriate comment style for the source language (see examples below).
When to use inverted syntax?
Inverted syntax is most useful when the script is multiple lines long, or when you want to take advantage of the language syntax highlighting and autocomplete features of your text editor.
Inverted syntax config
When using the inverted syntax, the whole snippet text will be interpreted as if it was a file specified in the root of the config, as follows:
| To intepret as... | Include these fields... |
|---|---|
shell script file | Specify interpreter string. |
applescript file | Specify language: applescript. |
javascript file | Specify language: javascript or language: typescript and omit module field. |
module | Specify language: javascript or language: typescript with module: true. |
Inverted syntax examples
Here is a Python example:
python
# #popclip
# { name: Hello Python, icon: hi, after: show-result, interpreter: python3 }
import os
print('Hello, ' + os.environ['POPCLIP_TEXT'] + '!', end='')
An alternative way to specify a shell script's interpreter is to put a shebang (#!) line at the top, in which case, the interpreter field is not needed:
python
#!/usr/bin/env python3
# #popclip
# { name: Hello Python 2, icon: hi, after: show-result }
import os
print('Hello again, ' + os.environ['POPCLIP_TEXT'] + '!', end='')
An AppleScript example:
applescript
-- # PopClip LaunchBar example
-- { name: LaunchBar, icon: LB, language: applescript }
tell application "LaunchBar"
  set selection to "{popclip text}"
end tell
.popcliptxt files
You can save a snippet to a plain text file with a .popcliptxt extension. When you double-click such a file in Finder, PopClip will load the snippet from the file and install it. There is no size limit on the snippet when installed by this method.
Further examples
There are lots of snippet examples posted in the PopClip Forum. Here are a few interesting ones that demonstrate various techniques: